

CentOS Setup and Networking using Virtual Box

This article will touch upon installing CentOS 7 and help setup your network in such a way that the servers can connect to the Internet, as well as ping others in the guest network.
Download binaries
- Download the CentOS7 ISO. Click on Minimal.
- You can select a mirror closest to you.
- Download Virtual Box.
Set up Virtual Box & CentOS
- Setup of Virtual Box is straightforward. Simply follow the instructions and you will be good.
- Start Virtual Box and click on New. Fill it according to your preference. Ensure your screen looks similar to mine, and click
Create.
- Change the file location if you need to:

- Point to the ISO file:

- Use Tab key and navigate to Install CentOS 7 option, before hitting Enter.

- Setup will start... choose your language and click Continue.

- Under System category, click Installation Destination

- Partition if you like, I will simply click Done.

- Ensure that Ethernet is On. ALSO, ensure that you provide a Host name here. I am calling my server
myServer.local
- Click Begin Installation

- While the installation has started, you need to set the
rootPassword
- Set your root password and click Done.

- Soon enough, the setup will continue:

- Reboot when prompted.
- Oh the joy! You are presented the login prompt. Key in your details and login.

Check Internet Connectivity
At the prompt, type:
curl www.google.com
You will see an output from Google. If the network is not working, you will typically see a timeout. This behaviour implies that without setting up anything specific, you are connected to the Internet. The question is, how?
The answer is NAT or Network Address Translation. Notice that, NAT allows your GUEST OS to talk to the Internet, but not the other way round. If you would like the world to connect to this server, you will need to setup Port Forwarding. But that’s a story for some other day. For today, let’s ensure that multiple CentOS servers are able to talk to each other.
Create another instance of CentOS in a similar way and ensure that it is able to connect to the Internet.
Let the servers talk!
A number of times it is found that people struggle with setting up things the right way when using Virtual Box. For instance, if there are 2 servers created in a way as mentioned above (with NAT), you will NOT BE able to make them talk to each other. You can read more about the details here. The reason is security. You can have as many VMs spun in your host, and you don’t need to bother about who can talk to whom. But what if, you really want to let them talk to each other, and at the same time you want them to be connected to the internet? There are multiple ways in which you can do it, but I will show you an extremely simple (and commonly ignored) option.
- Open preferences (or Settings option if you are using Windows)

- Select Network tab and click on the + icon in the right section so that you see NatNetwork get added.

- Double click on NatNetwork to change the name and other details:

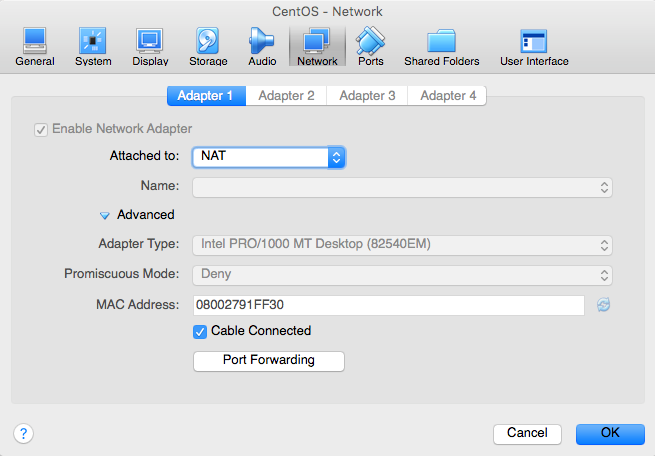
- Now, open settings of your VM and click network. Change the Attached to option to NAT Network. This will give you all the goodness of NAT along with capability to let the VMs talk to each other. Click Ok.

- You are all set now!
- Type the following on your VMs console and you will see the appropriate IPs assigned.
ip addr
- Try pinging the servers using their IP and it should now be working!
Hope this helps 👍

