
Building an Expense App with PowerApps and SharePoint


Let’s Build an Expense App Using PowerApps
This step-by-step guide includes visuals and code snippets to help you save data to SharePoint list via a Custom Form.
1. Setting Up the SharePoint List
Before connecting PowerApps to SharePoint, we need to create a SharePoint list to store your expense data.
Steps to Set Up the SharePoint List:
-
Navigate to Your SharePoint Site. Log into your Office 365 account and open your SharePoint site.
-
Create a New List. Create a new list—name it something like
Expenses. -
Define the Columns. Add the following columns:
-
Name: Single line of text
-
Email: People type
-
Receipt: Use the default Attachments or a Hyperlink or Picture column if capturing images
-
Amount: Currency or Number, based on your preference
-

2. Connecting PowerApps to Your SharePoint List
Now that your SharePoint list is ready, let’s connect it to PowerApps.
Steps to Connect PowerApps to SharePoint:
-
Open PowerApps Studio. Launch PowerApps via web or desktop.
-
Create or Open Your App.
-
Add a Data Connection
-
Click Data in the left panel.
-
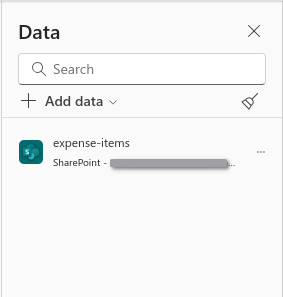
Click + Add data, select SharePoint and enter the URL of your SharePoint site.
-
Choose your site and locate your
Expenseslist.
-
3. View the data using DataTable control
Insert a Data Table and map it to the Expenses table. Show/hide field as necessary. This table will show the list of records in SharePoint Expense List.
Add a Button with text "New". If the list has zero items, you can navigate to another screen which has a Form . In the button > OnSelect, write the following:
NewForm(Form);
Navigate(Screen2,ScreenTransition.Cover)
Add another Button called "Edit". This button will change the form to Edit mode and allow you to edit the selected item.
EditForm(Form);
Navigate(Screen2,ScreenTransition.Cover, { SelectedItem: DataTable.Selected});
Add one more button called "Remove". This button should delete the selected item.
Remove(Expense-items, DataTable.Selected)
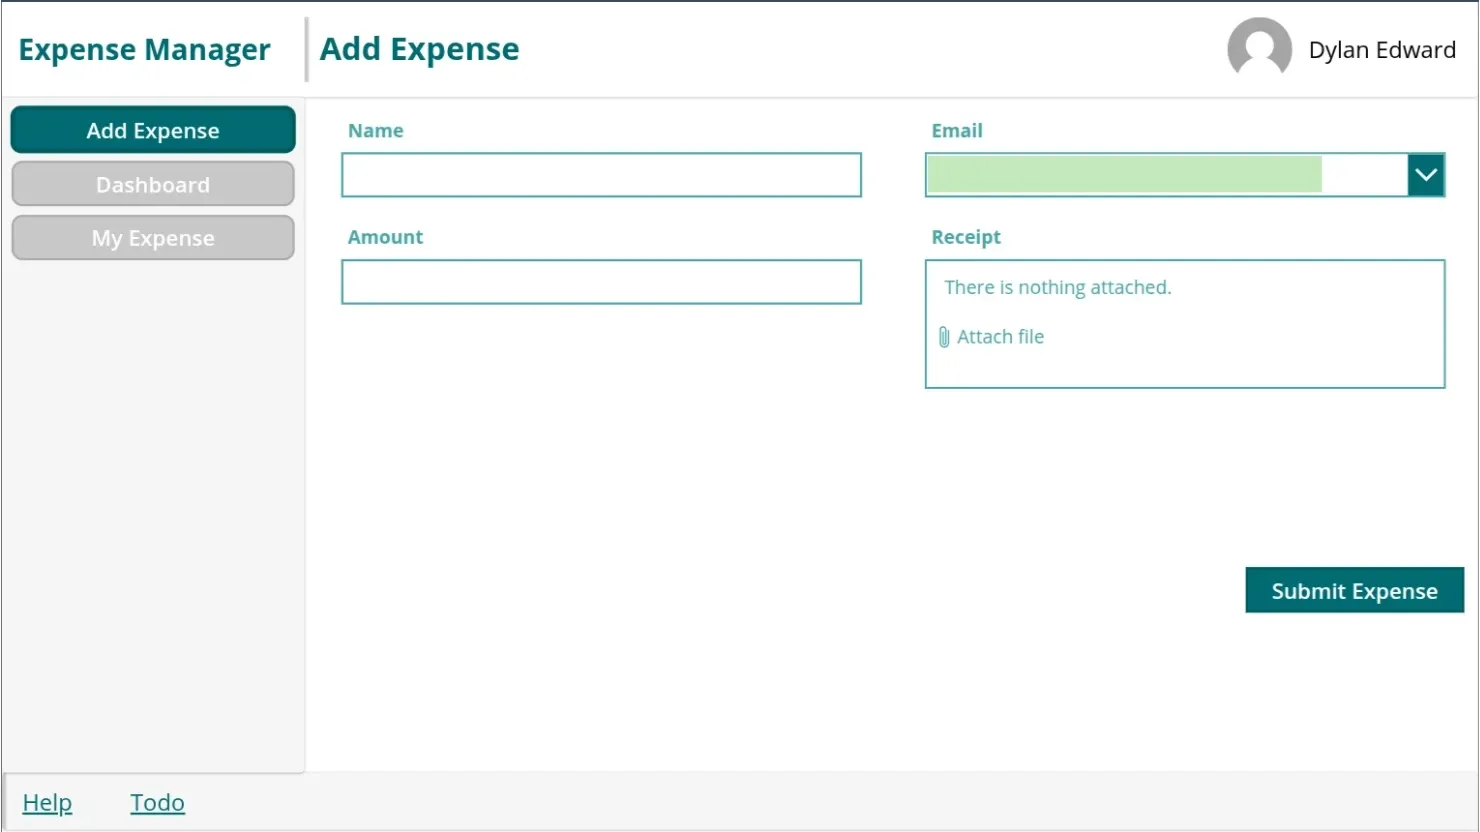
4. Creating the Custom Form
With SharePoint connected, it’s time to build a custom form.
a. Insert the Form Control
-
Go to the Insert tab → Forms → Edit Form
-
Set the DataSource property to your SharePoint list (
Expenses) -
Position the form on your screen
b. Customize the Form Fields
-
Click the form, open the Edit fields pane
-
Add the required fields:
-
Name
-
Email
-
Receipt (Attachments)
-
Amount
-
Field Customizations:
-
Receipt: PowerApps auto-includes an Attachment control if using SharePoint’s attachments. Ensure it's properly configured.
-
Email (Auto-populate): To automatically capture the logged-in user’s email, set the DefaultSelectedItems property of the Email field to (Remember to Unlock the control first):
{ '@odata.type': "#Microsoft.Azure.Connectors.SharePoint.SPListExpandedUser", DisplayName: User().FullName, Claims: "i:0#.f|membership|" & Lower(User().Email), Department: "", Email: User().Email, JobTitle: "", Picture: "" } -
Amount:You may apply validation using PowerApps functions to ensure it’s numeric or currency-formatted.
5. Implementing Form Submission
Now, let’s add the logic to submit data from your form to SharePoint.
a. Add a Submit Button
-
Go to the Insert tab → Button
-
Set the Text property to:
"Submit Expense"
b. Configure the Submit Logic
-
Set the OnSelect property of the button to:
SubmitForm(ExpenseForm)(Replace
ExpenseFormwith the actual name of your form control)
Enhance the User Experience:
-
OnSuccess Property of the form:
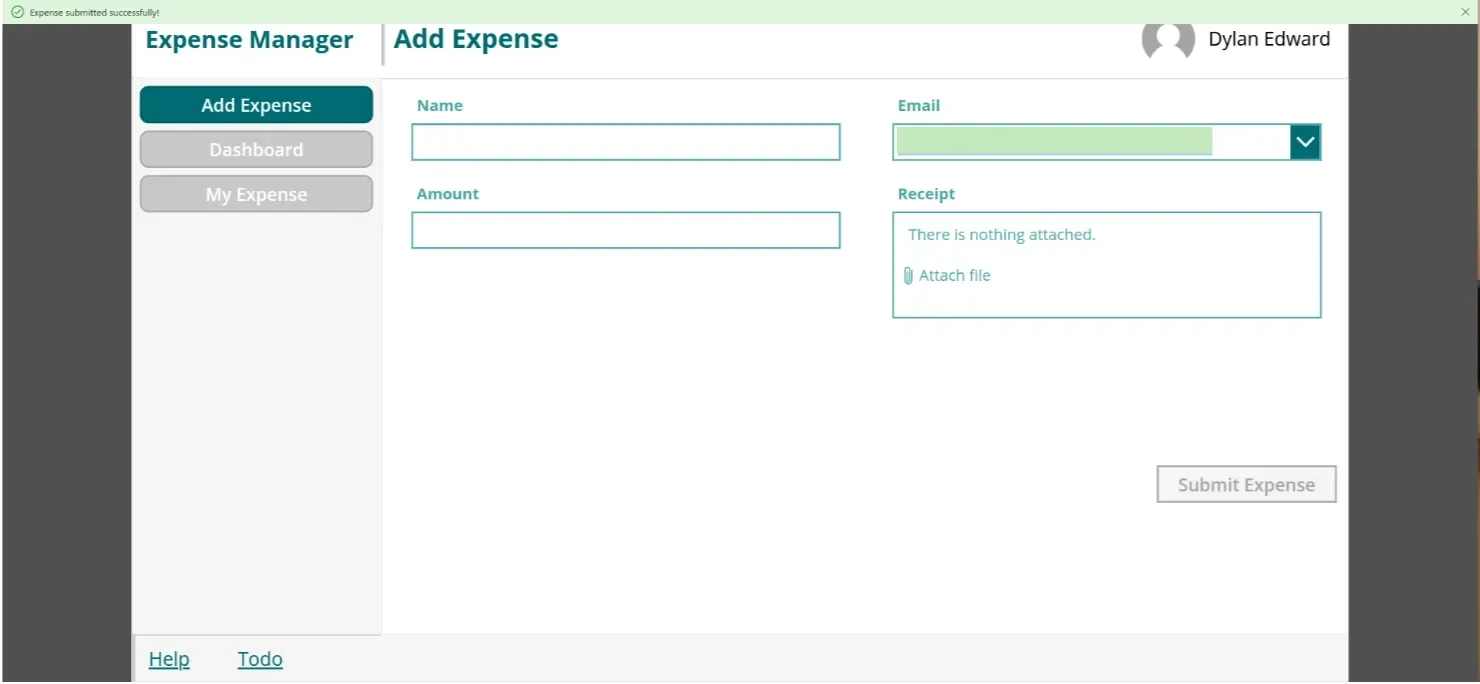
Notify("Expense submitted successfully!", NotificationType.Success); NewForm(ExpenseForm) -
OnFailure Property of the form:
Notify("There was an issue submitting your expense. Please try again.", NotificationType.Error)
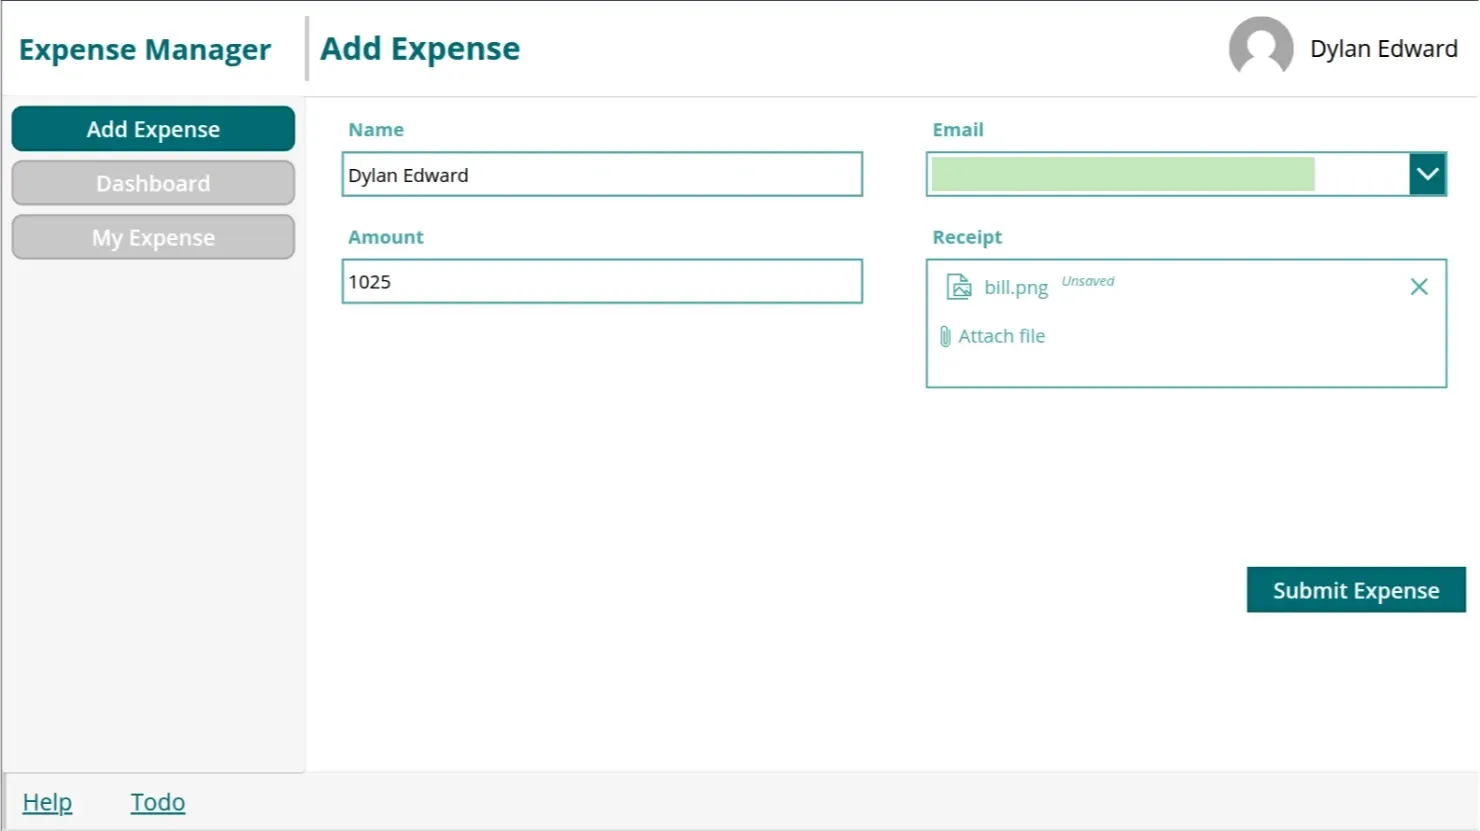
6. Testing Your Expense Submission
Time to test everything works as expected.
Steps to Test:
-
Fill out sample data in the form fields
-
Upload a test receipt
-
Click "Submit Expense"
Confirm the following:
-
A success notification is displayed
-
The form resets for a new entry
-
Data appears in your SharePoint list
In this guide, you learned how to:
-
Set up a SharePoint list
-
Connect it to PowerApps
-
Create a custom form with attachments
-
Auto-fill user email
-
Submit and reset forms with feedback
With these features in place, your Expense App now has a functional front end integrated with SharePoint. Stay tuned for more.

